Call of Duty: Modern Warfare II Season 03 Reloaded — Alboran Hatchery Map Intel
Alboran Hatchery
Galicia,凤凰六哥广场舞缘分让我们在一起 Spain
Day 03, 11:00
Factions Deployed: SpecGru / KorTac
Enter your date of birth
Month: Date: Year: Please enter a valid date. You may not access this content at this time Submit
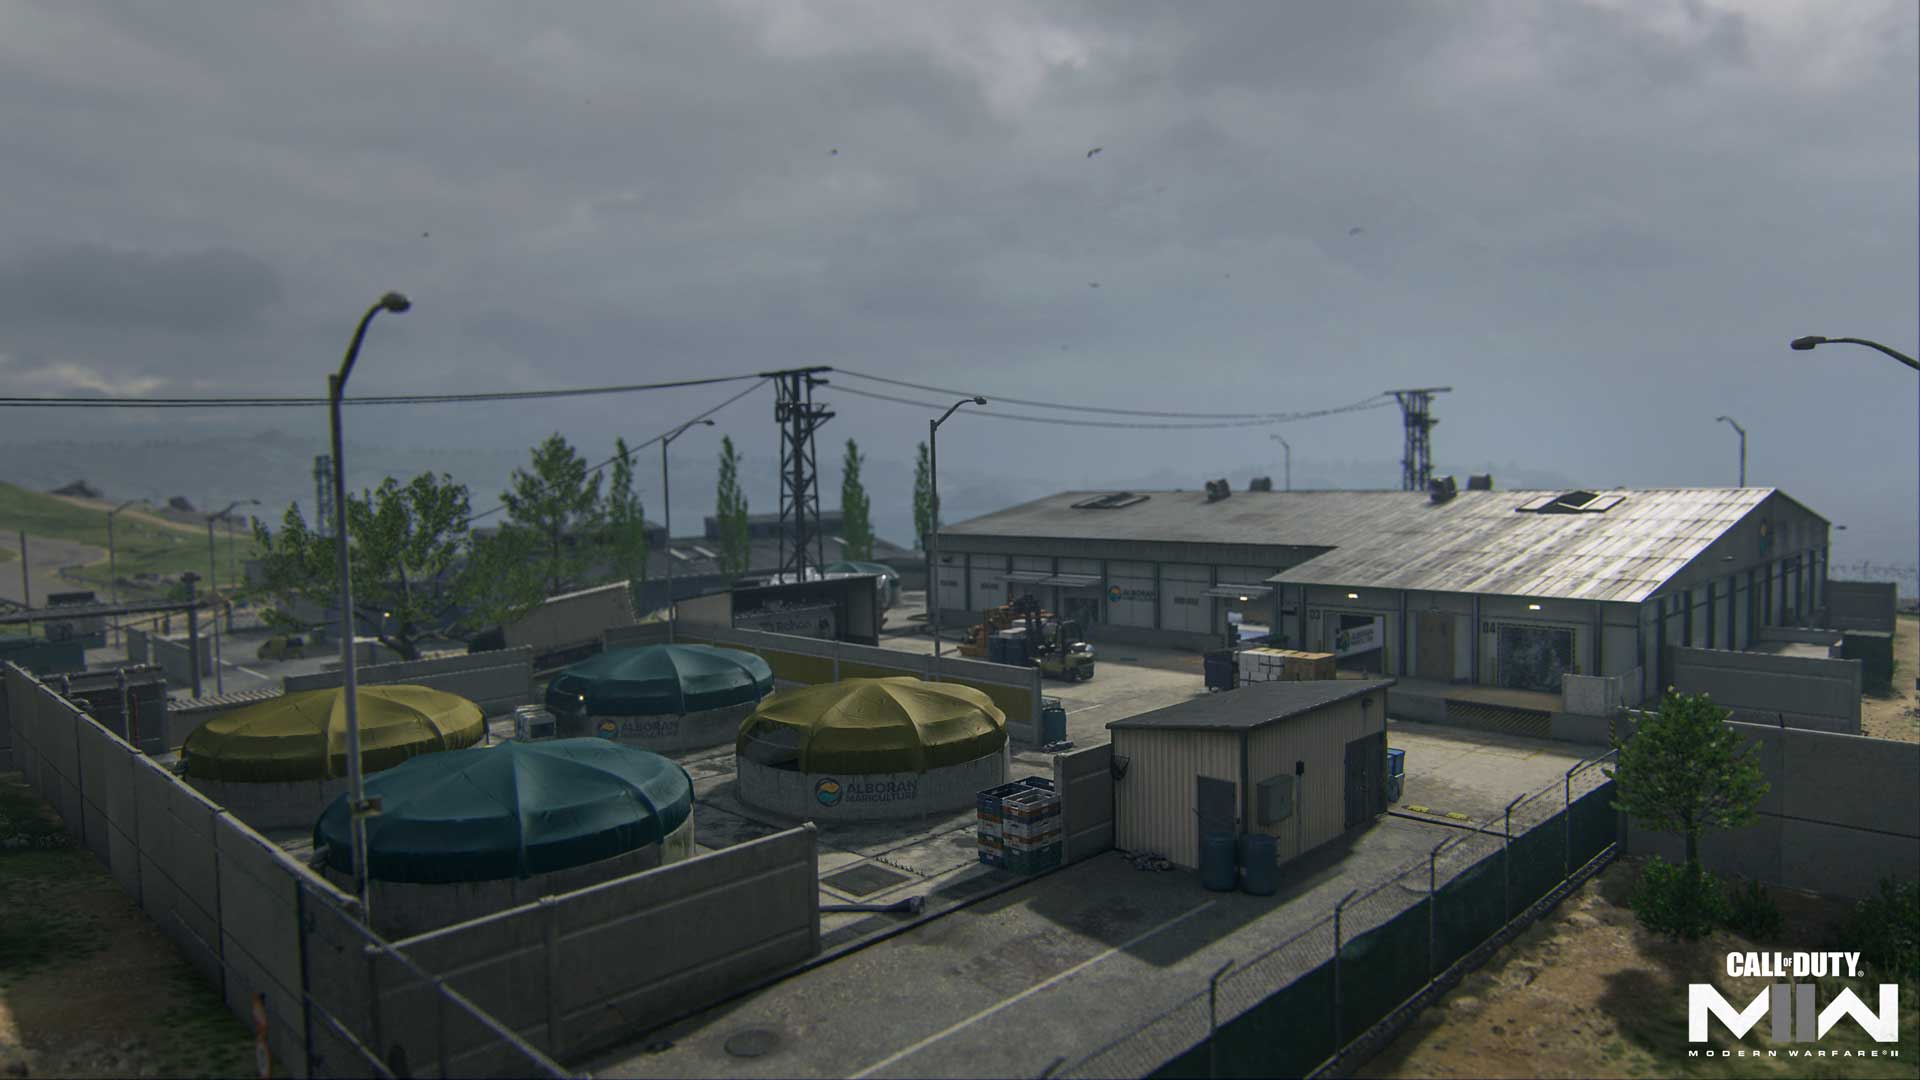
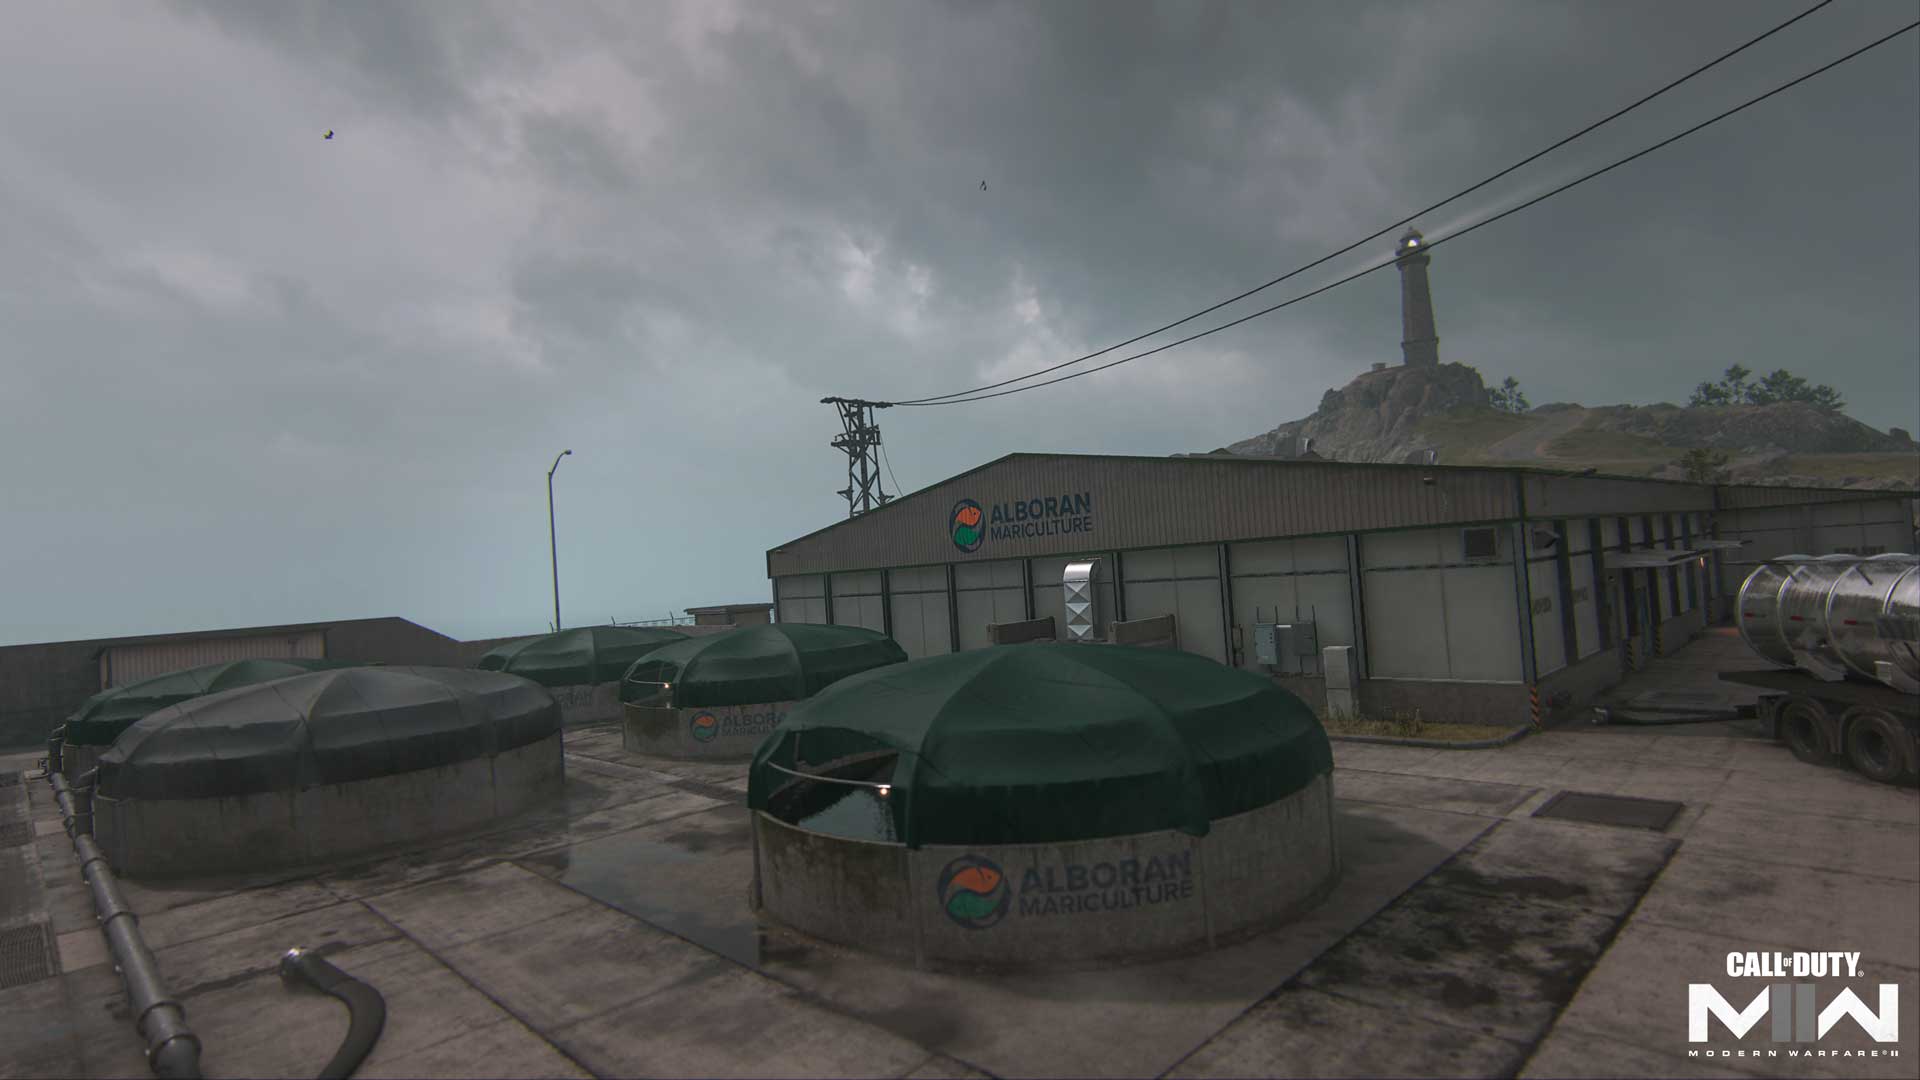
Prepare to deploy to Alboran Hatchery, a new 6v6 Multiplayer map launching as part of Season 03 Reloaded in Call of Duty®: Modern Warfare® II. On this medium-sized map, Operators must navigate in and around the hatchery’s storage and warehouse facilities set on a rolling green hill beneath towering wind turbines.
Use the large cover objects to conduct stealth operations around the map or climb up for a view of the surrounding area. It’s all about balancing exposure with intel-gathering here, with the best teams combining the two for a highly coordinated fight.
Spawn Point: KorTac
KorTac Spawn Zone (North) — Loading Area
Though the Fishery Warehouse is right by KorTac’s spawn-in location, the building doesn’t include rooftop access or south-facing windows. If you’re looking to engage the enemy right off the break, utilize your height advantage to move up and attack the enemy down the hill.
Be aware of your sightlines when moving up, always considering the Storage rooftop. Sometimes it’s better to stay low and out of view while other times you may want to climb up to better engage the enemy.
Spawn Point: SpecGru
SpecGru Spawn Zone (South) – Shipping Area
SpecGru forces spawn behind the southern Storage, with options to burst through the building or move up along the perimeter. As the enemy team starts the match at a height advantage, you might prefer to climb onto the roof. From there you’ll gain a commanding view of the map with plentiful opportunities for long-range combat and scouting.
Midrange players may prefer instead to navigate on the ground floor, using the map’s large cover objects to control their sightlines while moving up toward the Fishery Warehouse.
Map Maneuvers: Route Planning
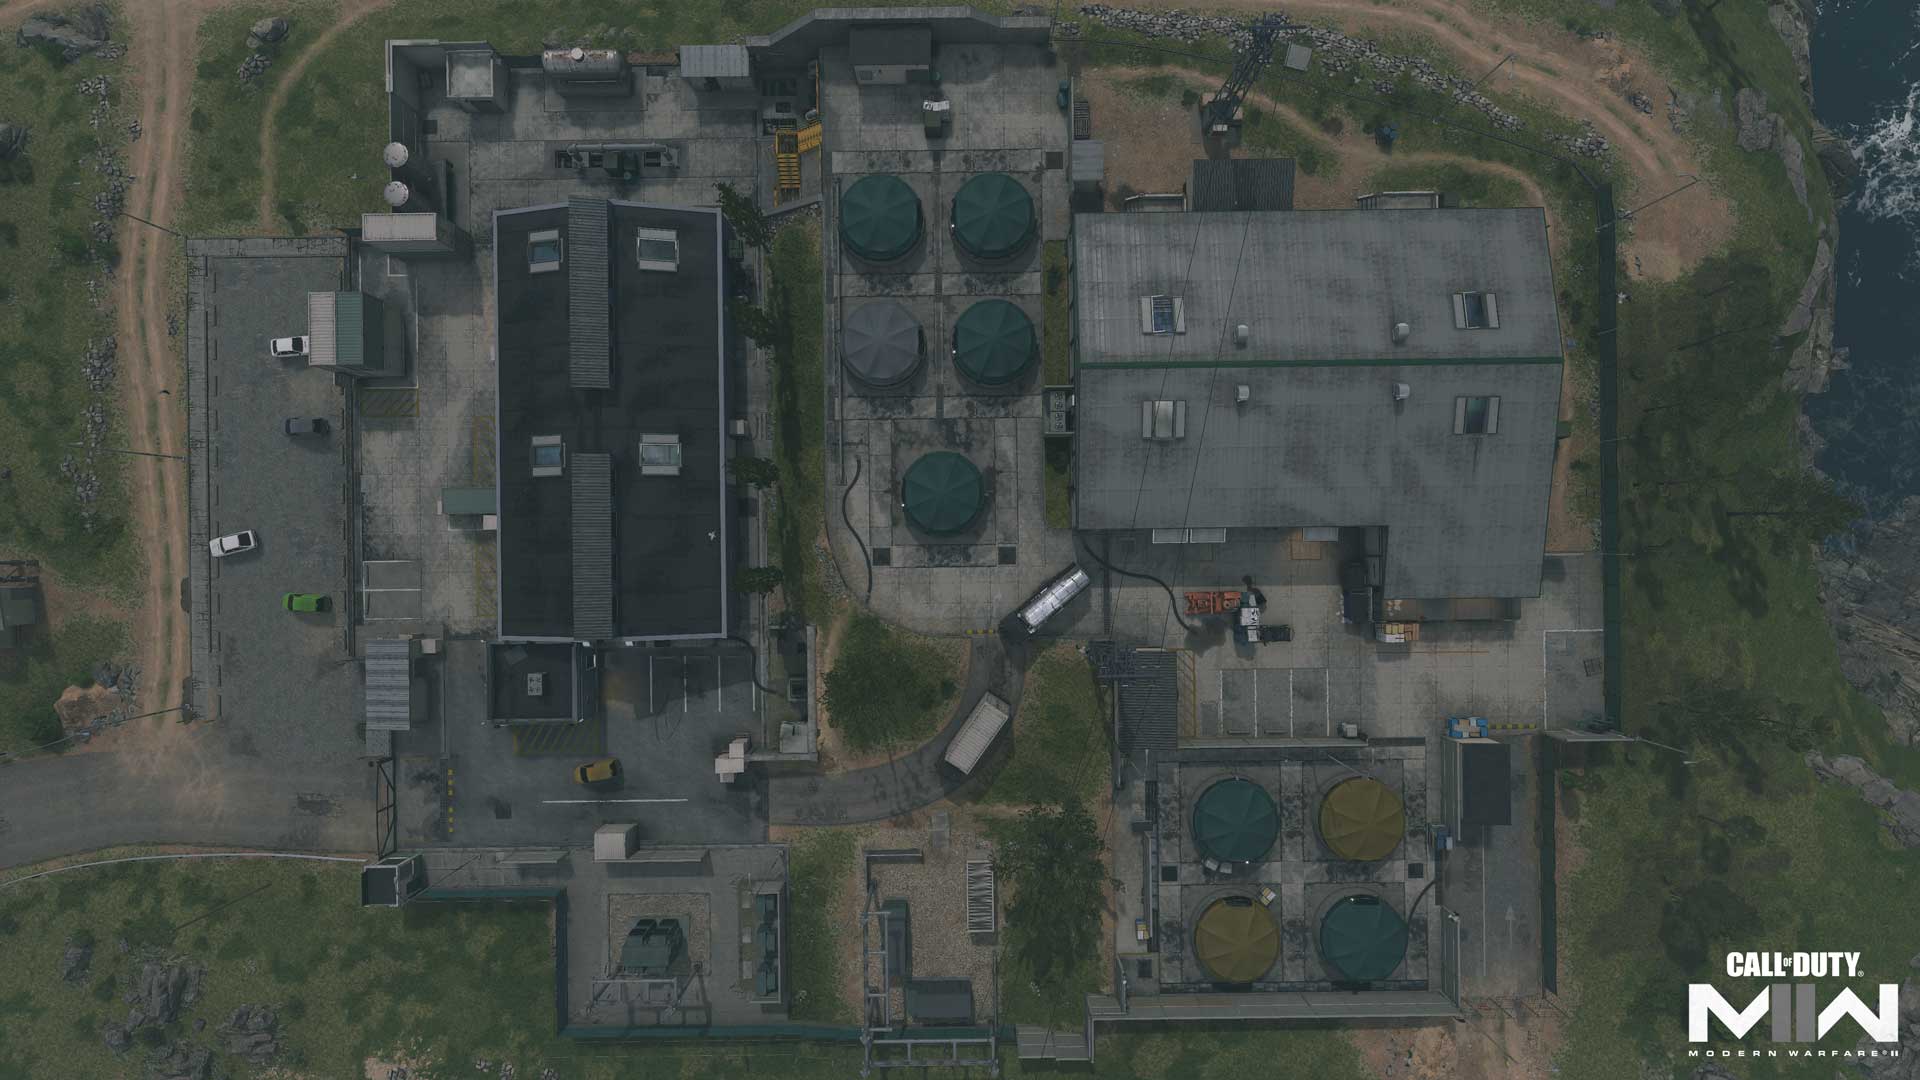
For the purposes of this guide, we’re breaking up Alboran Hatchery into four main sections:
- Fishery Warehouse
- Containers
- Main Entrance
- Storage Building
Fishery Warehouse
In its dominant position on the map’s north half, the Fishery Warehouse is a major thoroughfare with danger at every turn. Operators can navigate around the tanks and containers in search of their enemy or jump up and scan the area from above. It can get crowded in here fast, so consider the advantages of pushing the attack or slinking away and flanking.
Unlike the southern Storage building, the Fishery Warehouse rooftop is inaccessible. There are no south-facing windows to watch over the other side of the map, either. This focuses the fight on the inside of the warehouse, so be ready to engage on approach.
Containers
There are two exterior container zones: the central Mid Containers and the northern Side Containers. While positioned in different areas, moving through them presents largely the same challenges. Do you move slowly and carefully around the tanks, or climb up for a better view? Each presents its own risks and rewards. Note that even on top of the distant Side Containers, rooftop snipers on Storage can still take aim at your position.
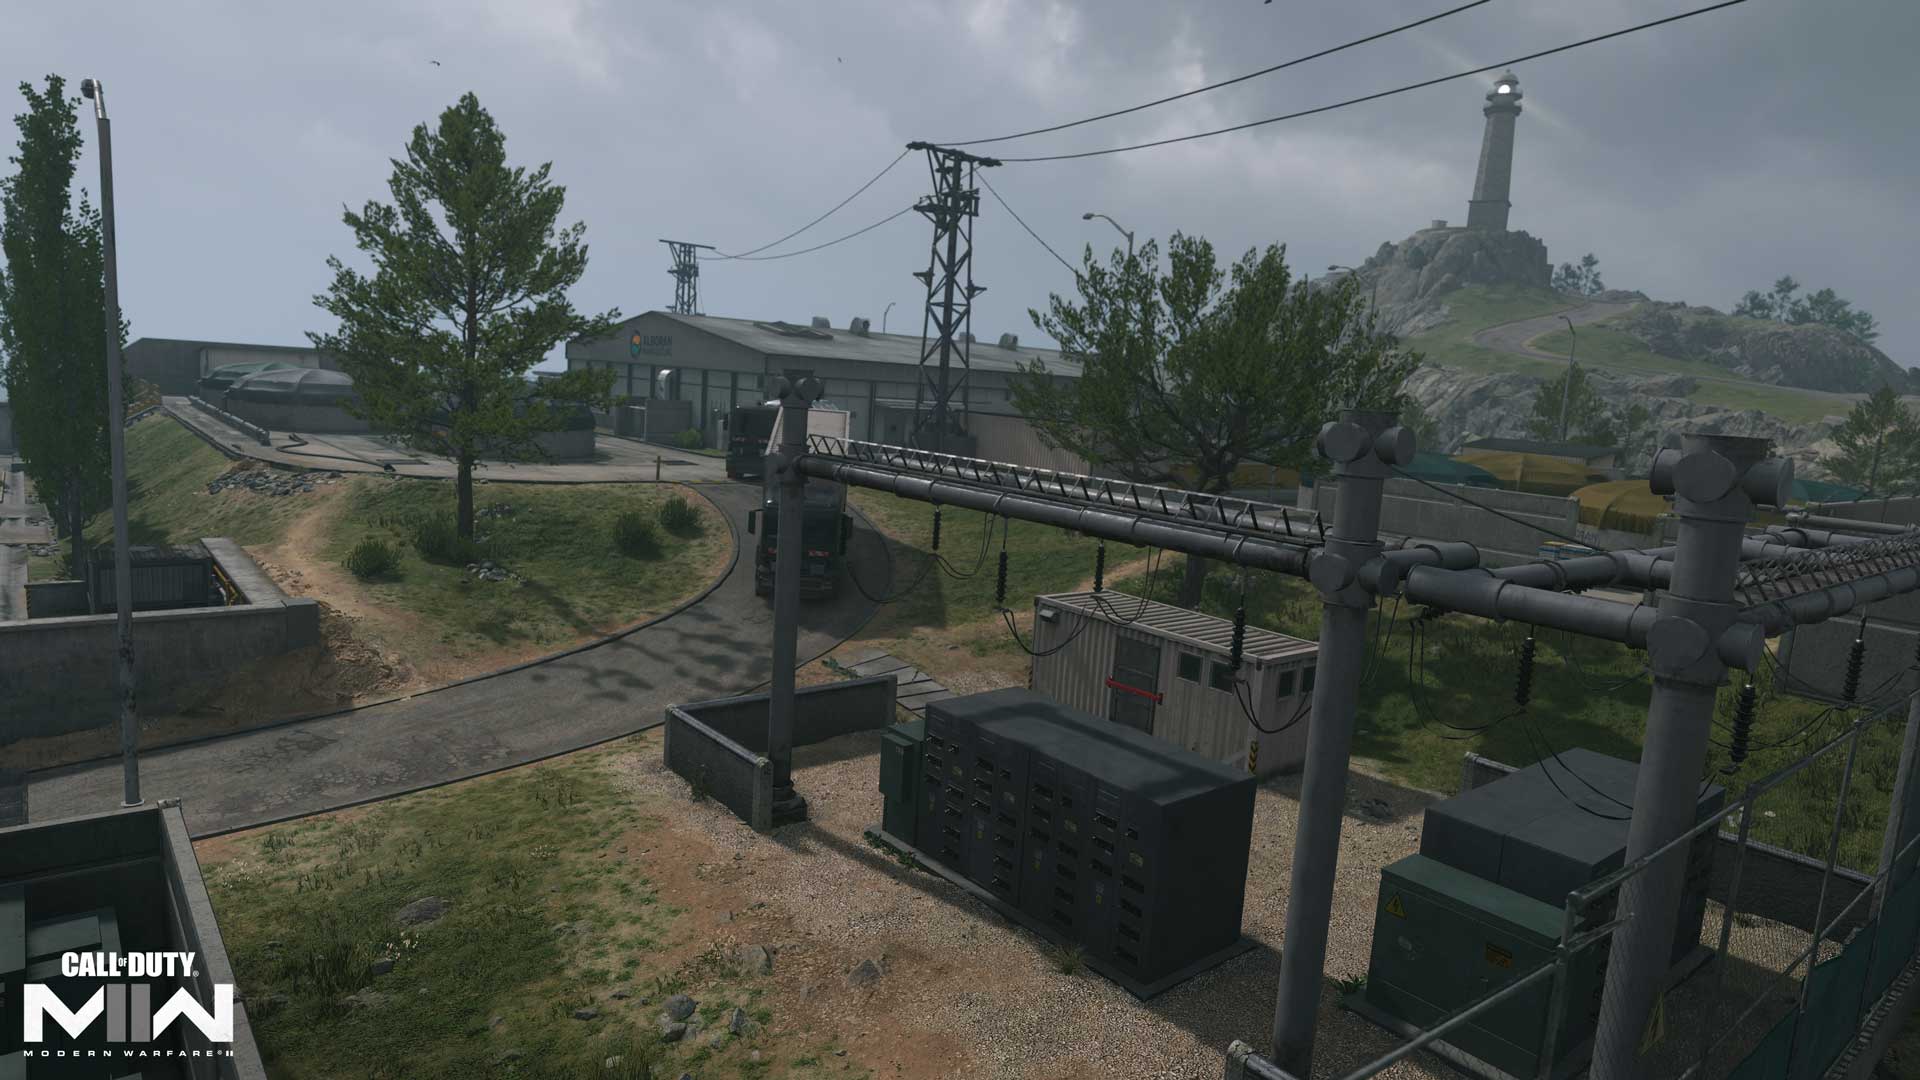
Main Entrance
For this guide, we’re including the eastern Electrical map section when discussing the Main Entrance, bordered by the two parked trucks. While midrange Loadouts will often trade shots up the hill, this area can be locked down with SMGs and Shotguns, too. Use the trucks, walls, and generators to minimize your exposure to long sightlines, forcing your enemies to engage at close range. If the fighting gets too hot, you can always slip away toward the Mid or Side Containers to keep engagements at arm’s length.
Storage Building
While positioned at the lowest point on the map, the Storage building hosts the greatest power position on its rooftop. With obstacles surrounding the perimeter, it’s easy to climb up and take aim at distant enemies. Each side of the roof has windows dropping down into the Storage interior as well, so you can quickly drop out of sight when spotted.
The Storage interior is more segmented than the northern Fishery Warehouse, with two main sections and the Foreman’s Office to the side. You can also move around the building’s flat perimeter; its west side leads to the yellow stairs climbing toward the Mid Containers and the east extends toward Electrical.
Objective Routes and Rotations
Mode Intel: Domination
Domination focuses the battle in and around the industrial buildings, with the A flag in the Storage Building, the C flag along the Side Trail next to the Fishery Warehouse, and the B flag in the middle of Electrical to the east. On a map this size, it’s most effective to fight for two flags and then hold your position. Flags A and B make a good combo, as players can use the Storage rooftop to get shots on B, or take A and C to keep the enemy contained in the east.
Communicate when you’re changing positions to keep your team evenly spread, and don’t hesitate to swap Loadouts when you need to adjust your playstyle. If the enemy team starts hammering one of your positions, consider pulling back and instead seek out their less contentious flag.
Mode Intel: Search & Destroy
Every tank, crate, and other large cover object takes on a sinister new meaning in Search & Destroy, as one small mistake can quickly lead to your elimination in the round.
Smart defenders will know to avoid the sightlines from the Storage rooftop as much as possible... Unless they trust their shot is true and they can pick off an inaccurate attacker.
It pays to move as a group, but how much you split up between the two bomb sites is up to you. Bring your full force to bear on one site or get loud at one while sneaking the bomb toward the other. Whatever your tactic, move up methodically and call out spotted enemies.
On defense, it can pay to hop onto one of the containers for a better view, though drop back down ASAP to avoid rooftop snipers. You’ll likely attract attention by showing off your position, giving you the advantage in setting up a defense. It may also be worth leaving a defender in the Fishery Warehouse who can readily rush to the defense of either bomb site as needed.
Mode Intel: Hardpoint
The fight intensifies in Hardpoint as players are taken around the map in a loosely counterclockwise direction from hill to hill. The hill order is as follows: Electrical, Fishery Warehouse, Storage Building, Side Containers, Mid Containers.
Expect the aerial streaks to light up when defending any of the three outside objectives, with more intimate battles erupting around the interior Storage and Fishery Warehouse points. Use scrap time to set up an early defense at the next hill, leaving one or two teammates along the path from the previous point to ambush enemies doing the same. Consider the Birdseye Ultimate Perk for a more zoomed out minimap to better track movement in and around the Hardpoints.
Top Tips
1. Just a peek. Use your excellent climbing ability to get up and over the tanks or to get on top of one of the center trucks. There are climbing opportunities everywhere here, and while you risk exposure in using them, the intel you’ll gain is often worth the price.
2. Recon in the air. Sometimes climbing onto something isn’t the best way to gather intel on the enemy, especially when you’ve got enemies scanning the horizon for such plays. The Recon Drone Field Upgrade is great in these situations, providing visuals and marking capabilities from above without exposing your Operator to harm.
3. A tool for every job. Sightlines change fast here, between close engagements near the containers and interior spaces and longer ranged fights breaking out across the map. Consider pairing the Overkill and Fast Hands Perks to spawn in with and quickly switch between two Primary Weapons, each focused on a different playstyle. Or you can opt for one of the new Season 03 Reloaded full-auto Handguns as your Secondary once you’ve completed their unlock challenges.
4. Off you go. Are enemy snipers having a field day on the Storage Building rooftop? Be an anti-sniper and circle around the back and sides of the building, climbing up at different points to attack players taking advantage of the power position. Clearing this rooftop makes it much safer for your team to move around on the ground.
5. Control the fight. With the cover options available to you, it’s largely your choice whether to pursue and press the fight in a skirmish or to fall back and let the enemy come to you. Always consider your current Loadout, the match needs, and your risk of exposure when determining how to best approach each battle.
6. Nice setup there. Hatchery’s many tanks, vehicles, and other large cover objects make it difficult to know who or what might be just around the next corner. Equip the Spotter Perk to see enemy equipment, Field Upgrades, and streaks through walls, helping you better determine exactly where the biggest threats are located.
7. Delivery on the way. Midsized maps like this are perfect for calling in Care Packages. Whatever team you’re on, there’s a good chance you can use one of the two buildings as cover while you call in the goods.
8. Ground siege. With the Fishery Warehouse and Storage Building providing air cover, you might want to consider ground-based streaks instead. Set up the Sentry Gun to cover the Main Entrance by Storage or atop one of the tanks for greater firing visibility. Call in the Wheelson-HS to hunt down Operators indoors and out.
9. Danger! Danger! Having trouble anticipating enemy movements? Equip the High Alert Ultimate Perk for a visual warning when an enemy player spots you outside of your view. When your vision pulses, get down, reposition, and hunt down the Operator who triggered the ability.
10. Mark your spawn. After getting some matches in, you’ll start to find your favorite spots, whether that’s holding it down inside or battling through the greater outdoor areas. With a Tactical Insertion on hand, you’ll have more opportunities to get back in the action exactly where you want to be . . . provided the enemy doesn’t destroy the flare.
Stay frosty.
© 2023 Activision Publishing, Inc. ACTIVISION, CALL OF DUTY, and MODERN WARFARE are trademarks of Activision Publishing, Inc. All other trademarks and trade names are the property of their respective owners.
For more information, please visit www.callofduty.comand www.youtube.com/callofduty, and follow @Activision and @CallofDuty on Twitter, Instagram, and Facebook.
Related ArticlesMay 03, 2023
Call of Duty: Warzone 2.0 and Call of Duty: Modern Warfare II Season 03 Reloaded Overview
Season 03 Reloaded brings the new Alboran Hatchery Core Multiplayer map, two new full-auto sidearms, Raid Episode 03, a new DMZ experience, the premiere of Warzone 2.0 Ranked Play, and more. Get ready to drop on May 10.
May 01, 2023
Support Veterans in Loot for Good, A Charity Extraction Challenge for Call of Duty: Warzone 2.0 DMZ
Between May 1 and May 7, Activision Blizzard will allocate $1 as part of a $1 million total donation to the Call of Duty Endowment (C.O.D.E.) for each DMZ match where at least $30,000 of in-game Cash is extracted. Track your progress on the Loot for Good leaderboard and earn an in-game reward for your efforts.
May 04, 2023
Ranked Play in Call of Duty: Warzone 2.0 — An Overview
Get ready to drop into this all-new Warzone 2.0 Ranked Play system. Learn everything you need to know about this mode, including rules, features, and rewards, in this miniature guide.
Back to Top Pre-order Vault Edition Previous Post| COD Blog
View All Call of Duty Posts
| COD Blog
View All Call of Duty Posts
Next Post
We're Hiring
Check Out Job Opportunities At Our Studios
Join Us
Our Teams
- Game Design
- Art & Animation
- Brand Management
- Production
- Quality Assurance
- Customer Support
- Studio Operations
- Programming
- Finance & Accounting
- Human Resources
相关文章
 中国娱乐网讯www.yule.com.cn 近日,2025年中美电影节China–US Film Festival)于洛杉矶隆重举行,群星汇聚,获全球媒体瞩目。著名演员、制片人孟瑶Nata2025-12-31
 副标题:热血传奇再燃!首场“传奇盛宴”揭幕,与玩家共绘未来篇章备受瞩目的首场“传奇盛宴”即将于5月31日在盛趣游戏总部拉开帷幕。这场盛宴不仅是对传奇全系2025-12-31
 随着经济社会的快速发展和城市化进程的不断加快,生活垃圾产生量不断增长。生活垃圾已成为困扰城市可持续发展的突出问题。生活垃圾混合收集处理,不仅使可再生资源得不到充分回收利用,而且占用大量土地,造成资源浪2025-12-31
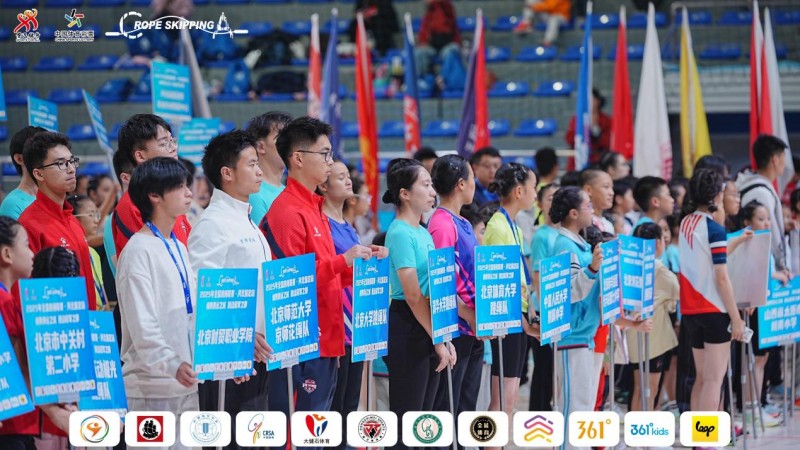 10月11日-14日,2025年全国跳绳联赛河北保定站)于保定市体育馆隆重举行。赛事由国家体育总局社会体育指导中心、中国毽球跳绳协会主办,全国跳绳推广委员会、保定市体育局承办,上海大健石体育文化传播有2025-12-31
 新华社快讯:柬埔寨国家电视台27日报道,柬泰两国当天签署停火协议,双方同意停火时间从当地时间27日中午12时开始。此前报道泰国与柬埔寨就停火问题签署联合声明央视新闻)△泰国尖竹汶府和柬埔寨拜林省之间的2025-12-31
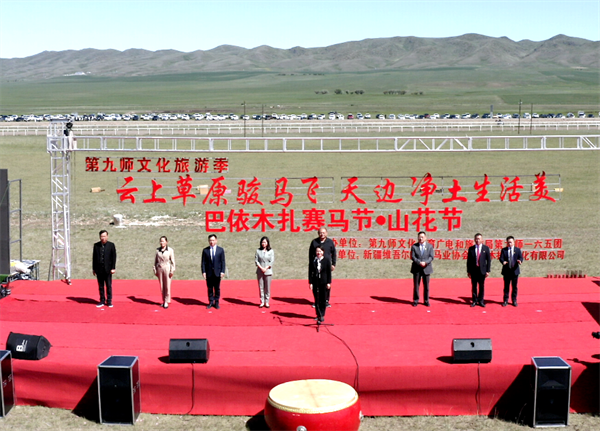 “云上草原骏马飞 天边净土生活美”第九师文化旅游季暨巴依木扎赛马节顺利开幕!本次活动从6月3日开始至7月1日结束,主要包括赛马、美食嘉年华、畅游花海、摄影大赛等活动。开幕日的赛马活动中,一共有43匹骏2025-12-31
最新评论